Plan your next big photoshoot
Get all 6 photography templates FREE in our photoshoot pack.
Start your photoshoot planSign up for free with no time limit
Follow this step-by-step guide to learn the modern process of planning a photoshoot in Milanote, a free tool used by top creatives.
Whether you’re a beginner or a seasoned pro, planning a photoshoot can feel stressful. There are a million things to organize. From the concept, visual references, the shot list, models, and much more. A great plan sets you up for success. It helps you organize every detail before the shoot so you can focus on taking amazing shots.
Traditionally, a project plan might be scattered across various emails, to-do lists, notepads and laptop folders. A central project plan combines these artefacts into one easy to access place. It will evolve over the lifespan of your project but usually includes:
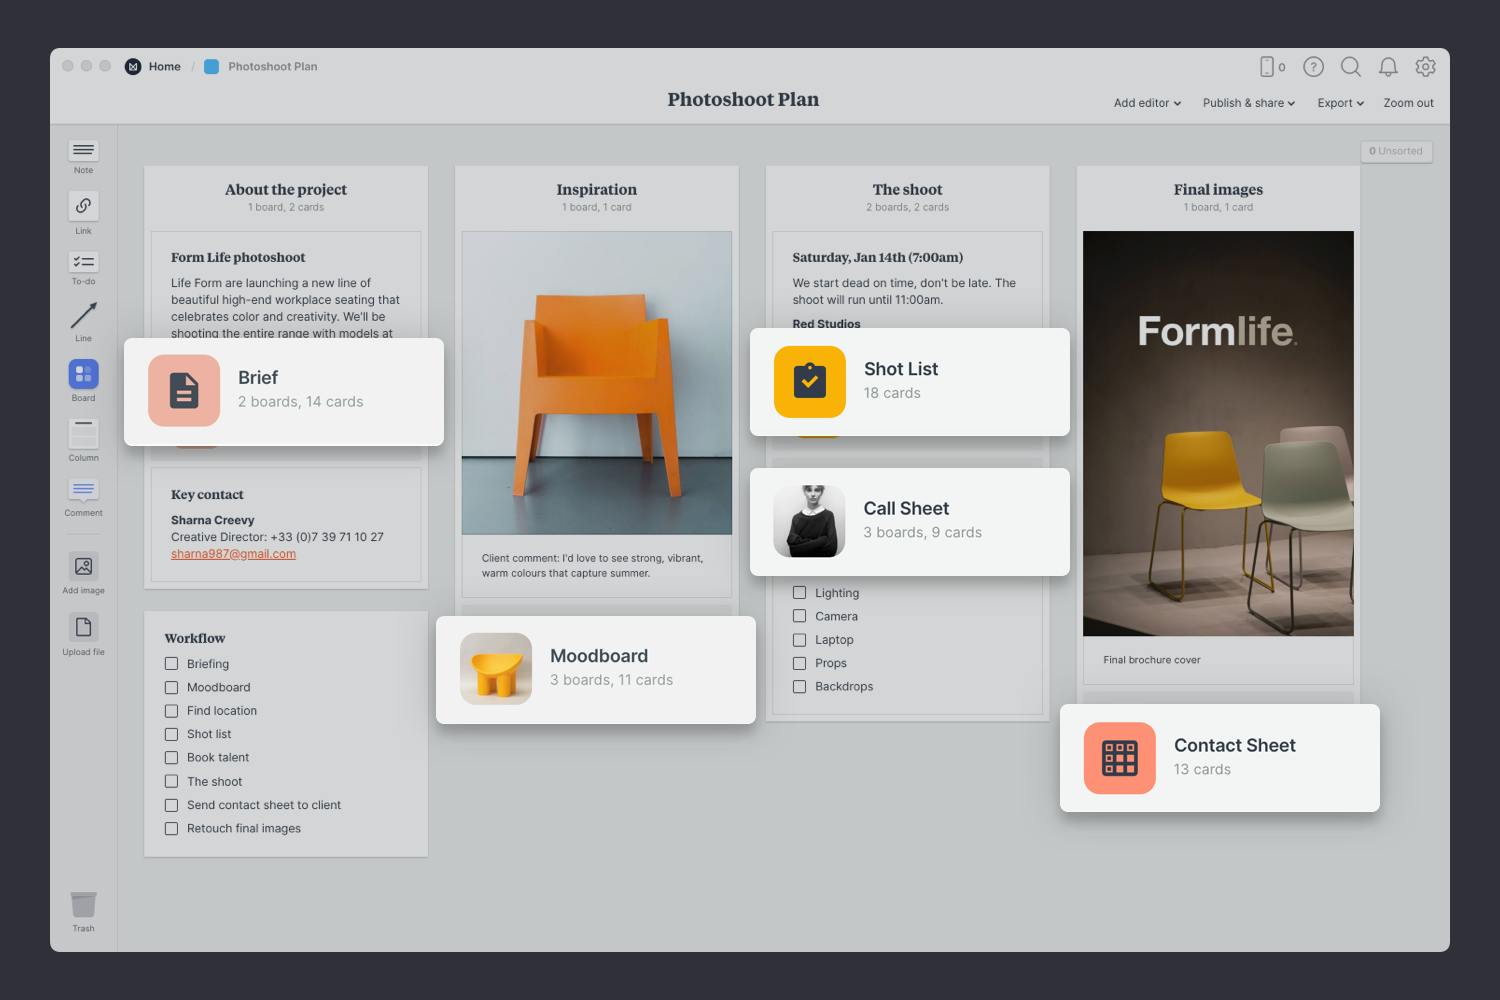
Create a new board for your photoshoot plan
Drag a board out from the toolbar. Give it a name, then double click to open it.
Choose the Photoshoot Plan template
Each new board gives you the options to start with a beautiful template.
A clear, inspiring, and informative brief provides the structure and direction for photographers to their best work. Photography briefs typically include background information, goals, deliverables, references, and information about the target audience.

You’ll find the board to create your brief on the Photoshoot plan board. Double click the Brief to open it and start adding the goals, concept and defining the audience.

Double click the Brief board to open it.
What do you want your images to communicate? Is there a specific concept or vision you have in mind? Use emotive words to communicate the style and mood you hope to achieve and list any specific shots you need. This helps the photographer organize their shot-list, equipment, props and talent before the day of the shoot.

Add a note to communicate the goals.
Start typing then use the formatting tools in the left hand toolbar.
Alongside your goals, list the shots you require. How many photos do you need? Where will they be used—in print, online or social media? This will help the photographer produce the required formats and prepare copyright details.
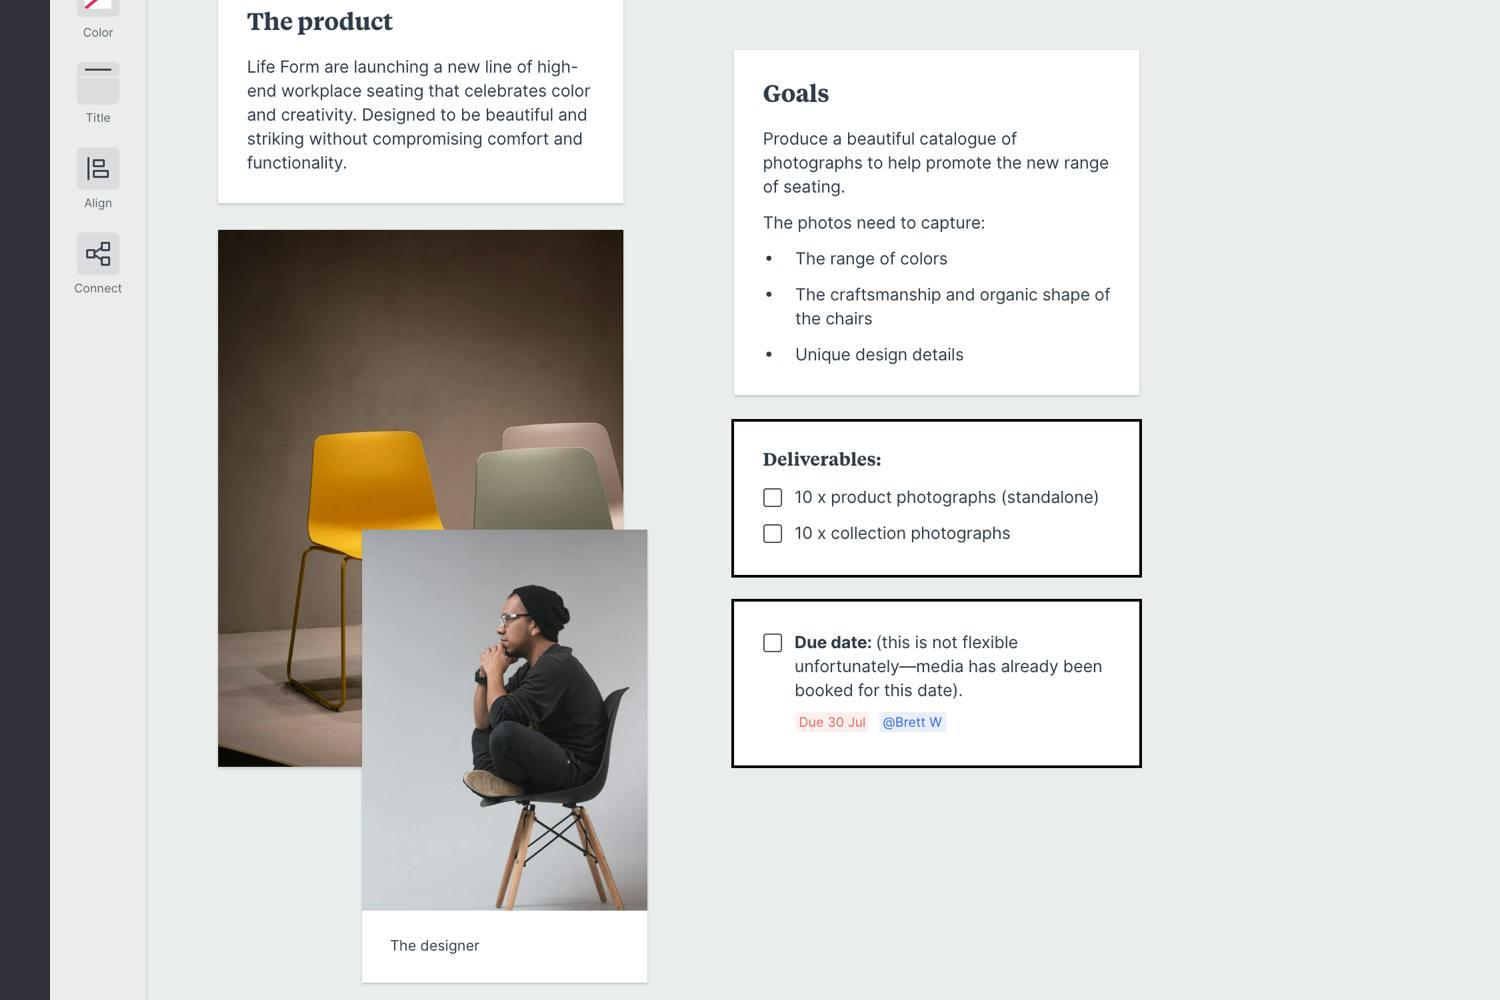
Create a new to-do list for the specific deliverables.
Start typing then press "Enter" to create a new item. Add a title to your to-do list using the left hand toolbar.
This is where you describe a specific type of audience and detail what’s important to them. What do they care about? What inspires them? Include any relevant research or stats you have. All this helps the photographer choose a mood or direction that speaks to your audience. Ansel Adams described how important the audience is when he said "There are always two people in every picture: the photographer and the viewer".
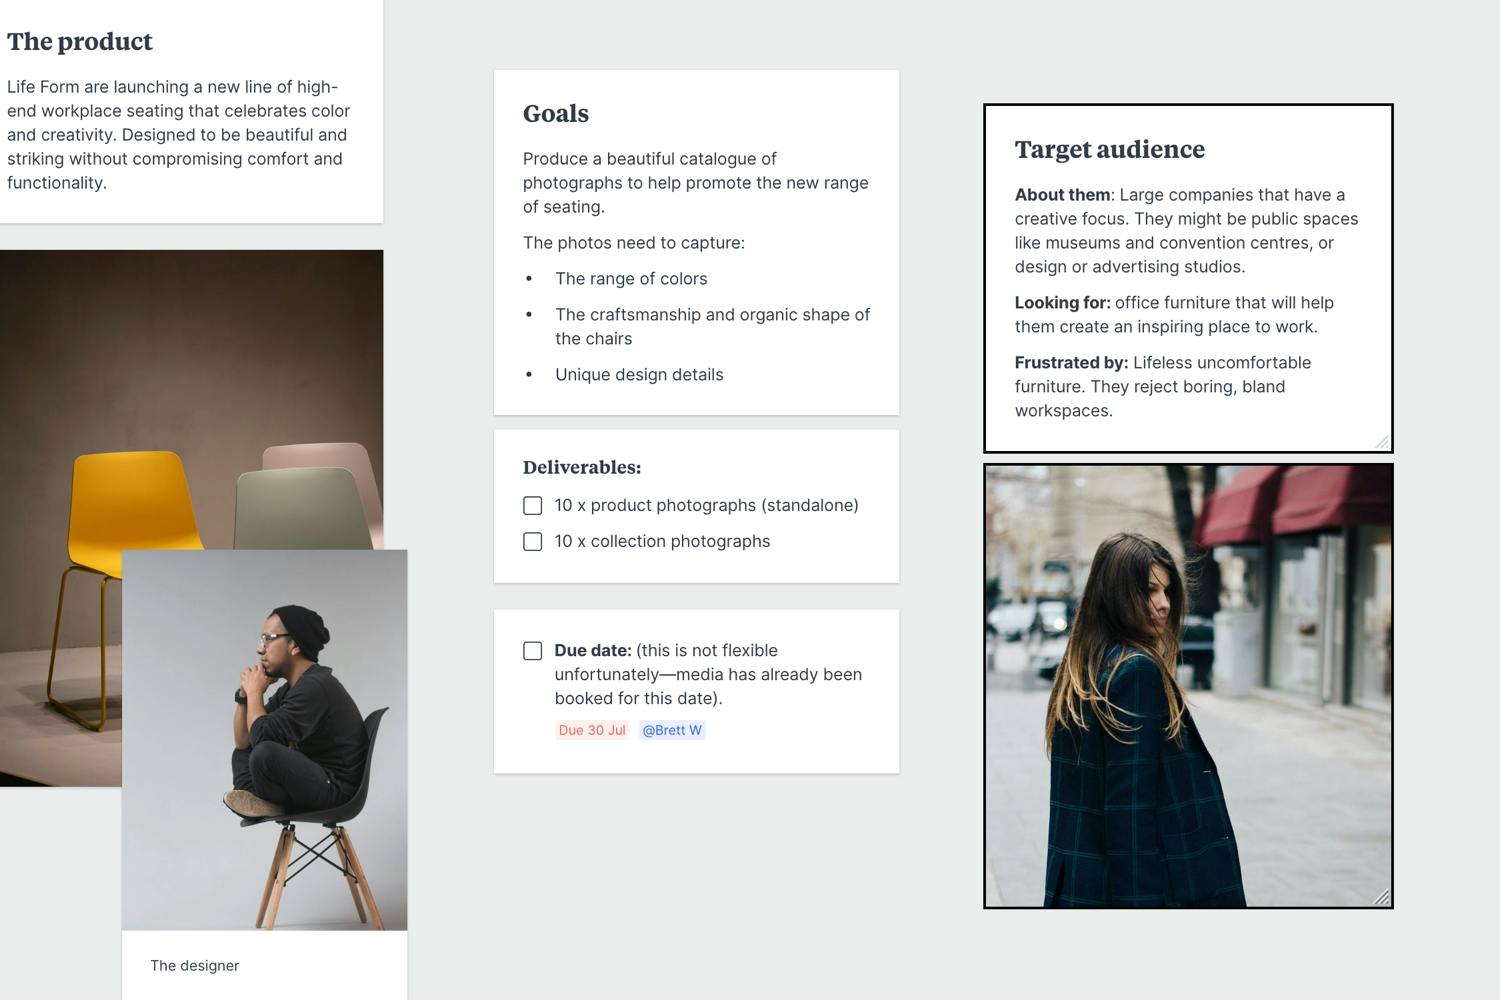
Add a note to describe your audience.
Start typing then use the formatting tools in the left hand toolbar.
Once you’ve made any final tweaks, it’s time to share the completed brief with your team so everyone's on the same page. If you want to learn more about writing a photoshoot brief, check out our dedicated photoshoot brief guide.
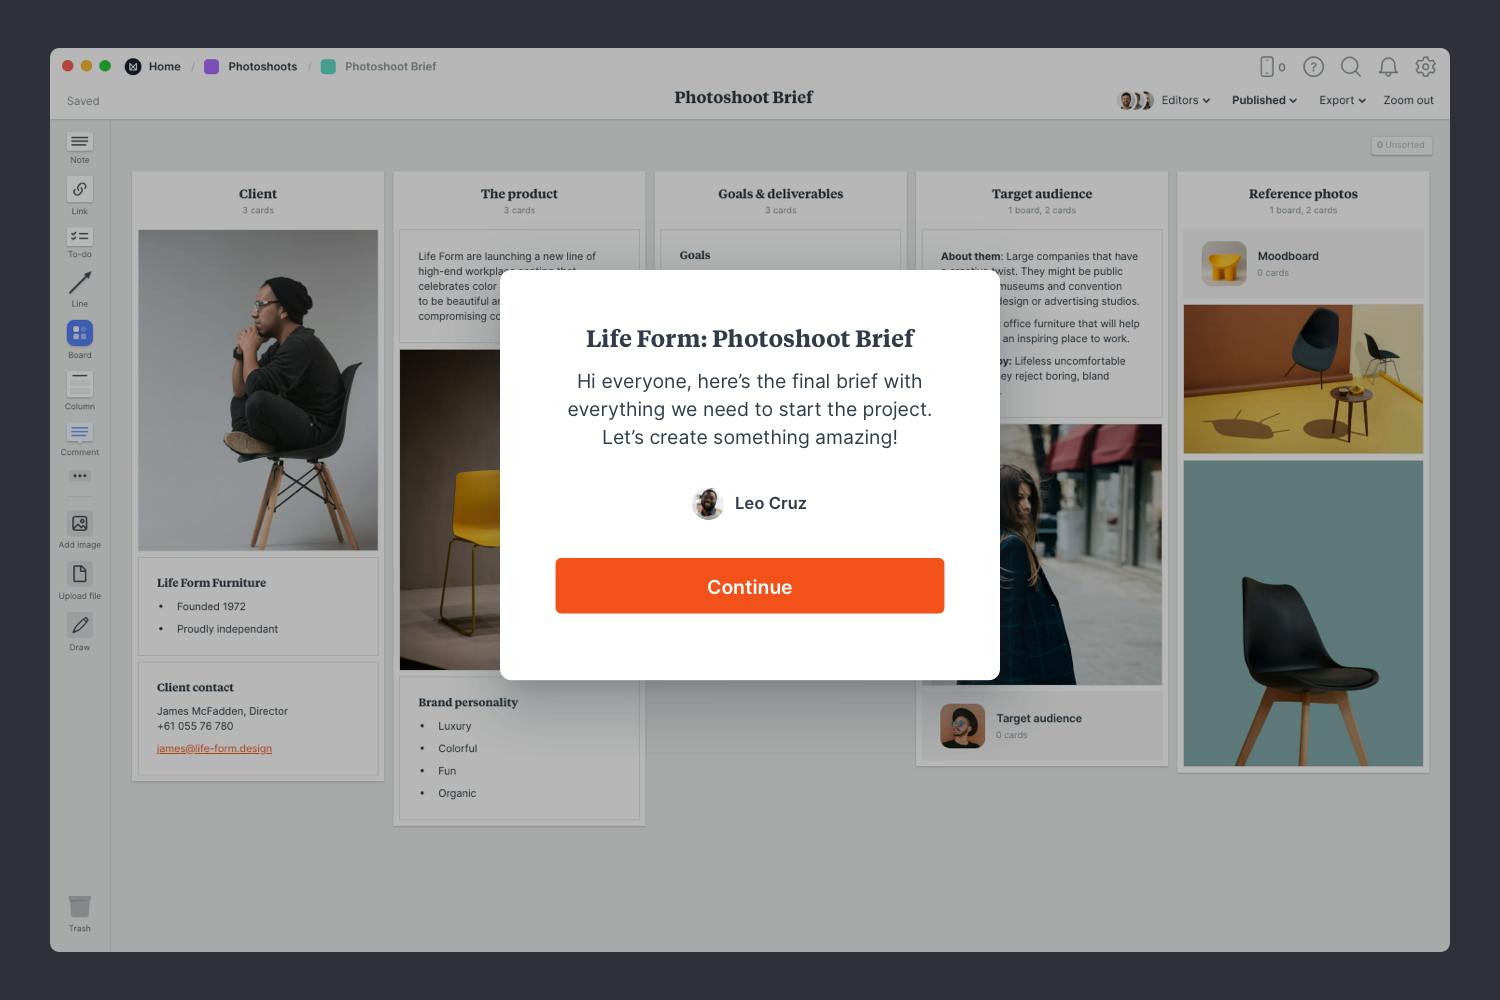
Publish and share the brief with your team.
Write a welcome message under the "Publish & share" menu. This will display the first time someone views your board.
In the brief, you set the goals and deliverables for your shoot. It's time to start exploring some visual directions with a moodboard. Photography moodboards can be used to plan and organize the final images you want to photograph, or they can be more about exploring the mood of a photoshoot.
You’ll find the board to make your moodboard on the Photoshoot plan board. Double click on the Moodboard to open it and start adding your inspiration.

Double click the Moodboard to open it.
Start by adding any existing material you have—this could be images from previous photoshoots or references your client has provided. Include any logos, existing expressions of the brand like websites or design elements.

Drag files from your computer.
Click the "Upload file" button or just drag a file onto your board. You can add images, logos, documents, videos, audio and much more.
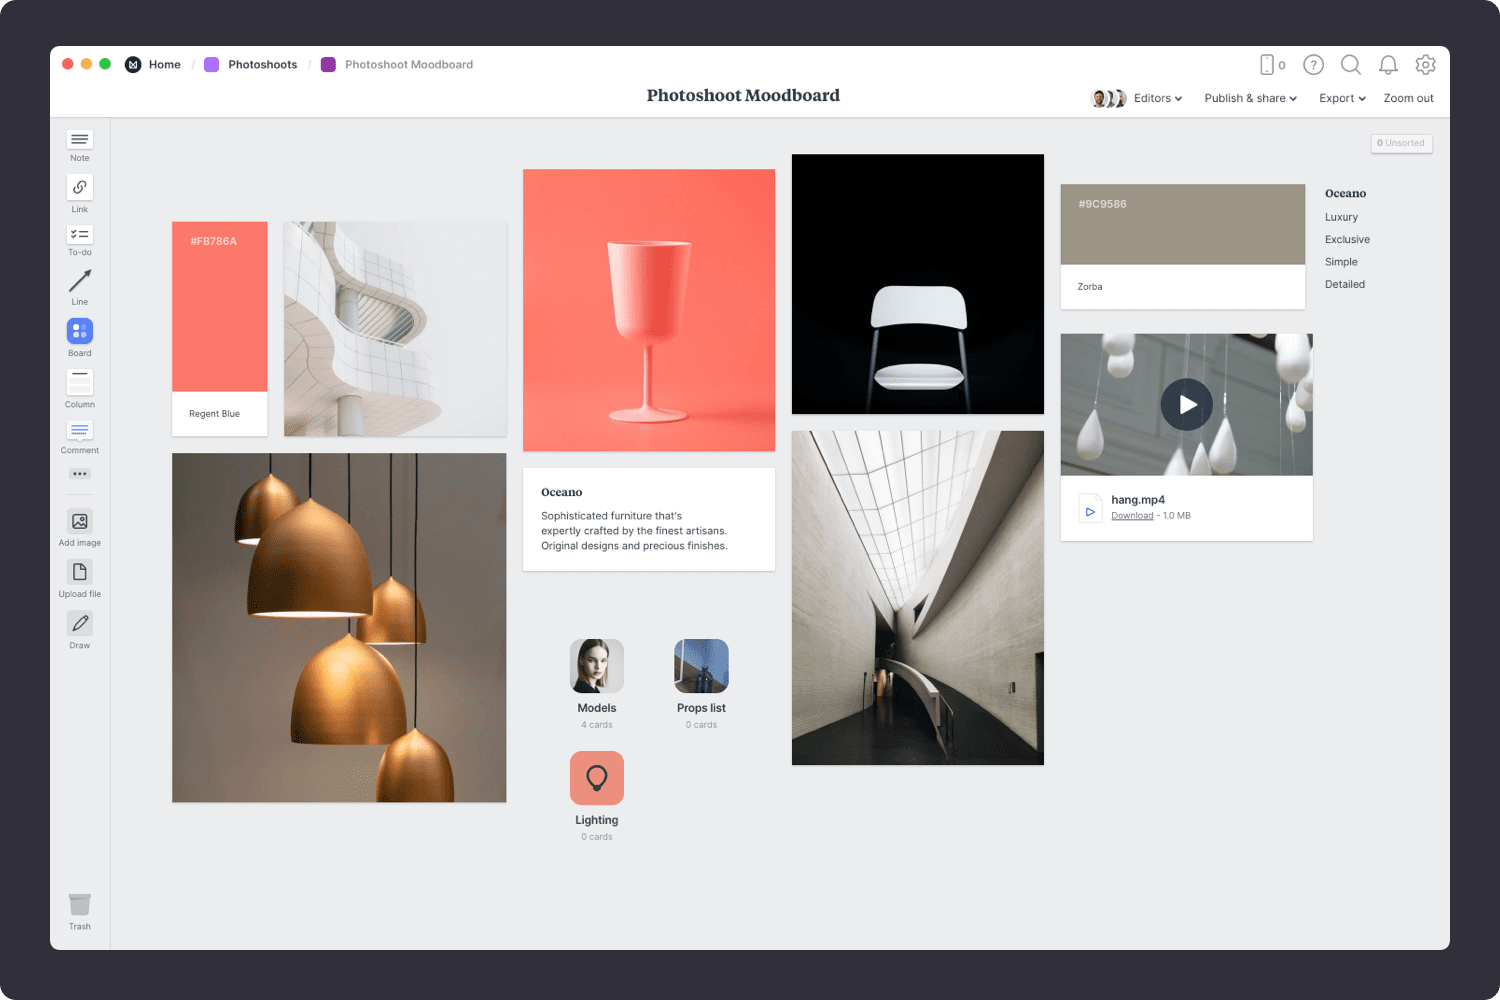
The imagery you bring into your moodboard is what helps to shape the look and feel of your photoshoot. These references can define things like tone, cropping, lighting and color. You can start by saving visual elements from around the web. There are lots of fantastic sites where you can find great visual inspiration for free, like Designspiration, Instagram or Pinterest.

Use the built-in image library.
Search over 3 million beautiful photos powered by Pexels then drag images straight onto your board.
Install the Milanote Web Clipper
Save images from other websites straight to your board.
Roll over an image (or highlight text), click Save, then choose the destination in Milanote. Return to your board and find the content in the "Unsorted" column on the right.
Once you have all your inspiration in one place, the next step is to arrange your ideas to create the perfect composition. Start by exploring composition and introducing hierarchy. Place a key element to anchor your board, and change the size and position of the remaining elements to indicate their importance and relationships to one another.
Resize your images to add hierarchy.
Drag the corner of an image to resize it. Double-click the corner to return it to its original size.
Crop images.
Double-click an image and press edit to crop or rotate it.
Now that your moodboard is complete, you have a powerful visual reference for your photoshoot. Remember, you can create multiple moodboards to explore different visual directions.
Next, we'll create a shot list so we don't miss a thing during the shoot…
Coordinating a photoshoot can be stressful and costly if that critical shot is missed on the day. But a clearly defined shot list will make sure nothing slips through the cracks.
A shot list is a simple checklist of every photo you (and you client) want to capture on the day of a shoot. It usually contains a list of specific shots, some visual references and extra details like camera angles or lighting set-up so you don't forget a thing.
You’ll find the board to make your shot list on the Photoshoot plan board. Double click on the Shot list to open it and start adding your planning.

Double click the Shot List board to open it.
Start by listing the subjects or topics you want to shoot. Depending on the type of project, these could be commercial products, parts of an event, a buildings or people. Adding references images or sketches will make your shot list easier to scan.

Upload images to your board.
Click the "Upload file" button or just drag a file onto your board. You can add images, logos, documents, videos, audio and much more.
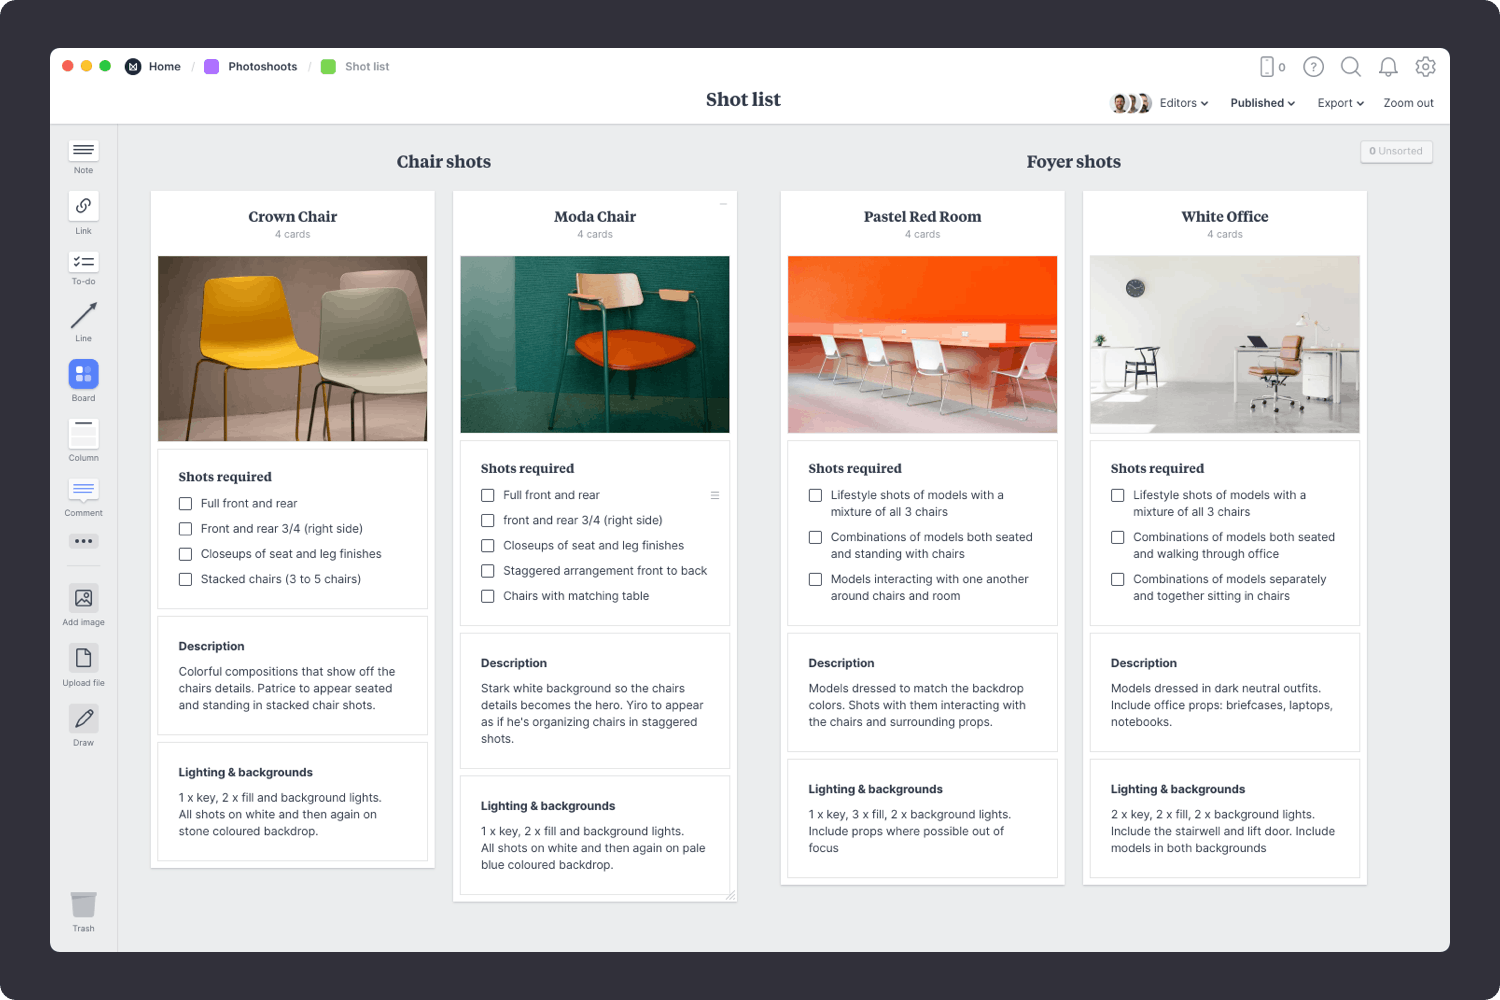
This is the heart of the shot list. It's where you list each shot you want to capture. Think about the different product angles, formats, arrangements, even where you'll position the camera.
Create a new to-do list for each of the specific shots.
Start typing then press "Enter" to create a new item. Add a title to your to-do list using the left hand toolbar.
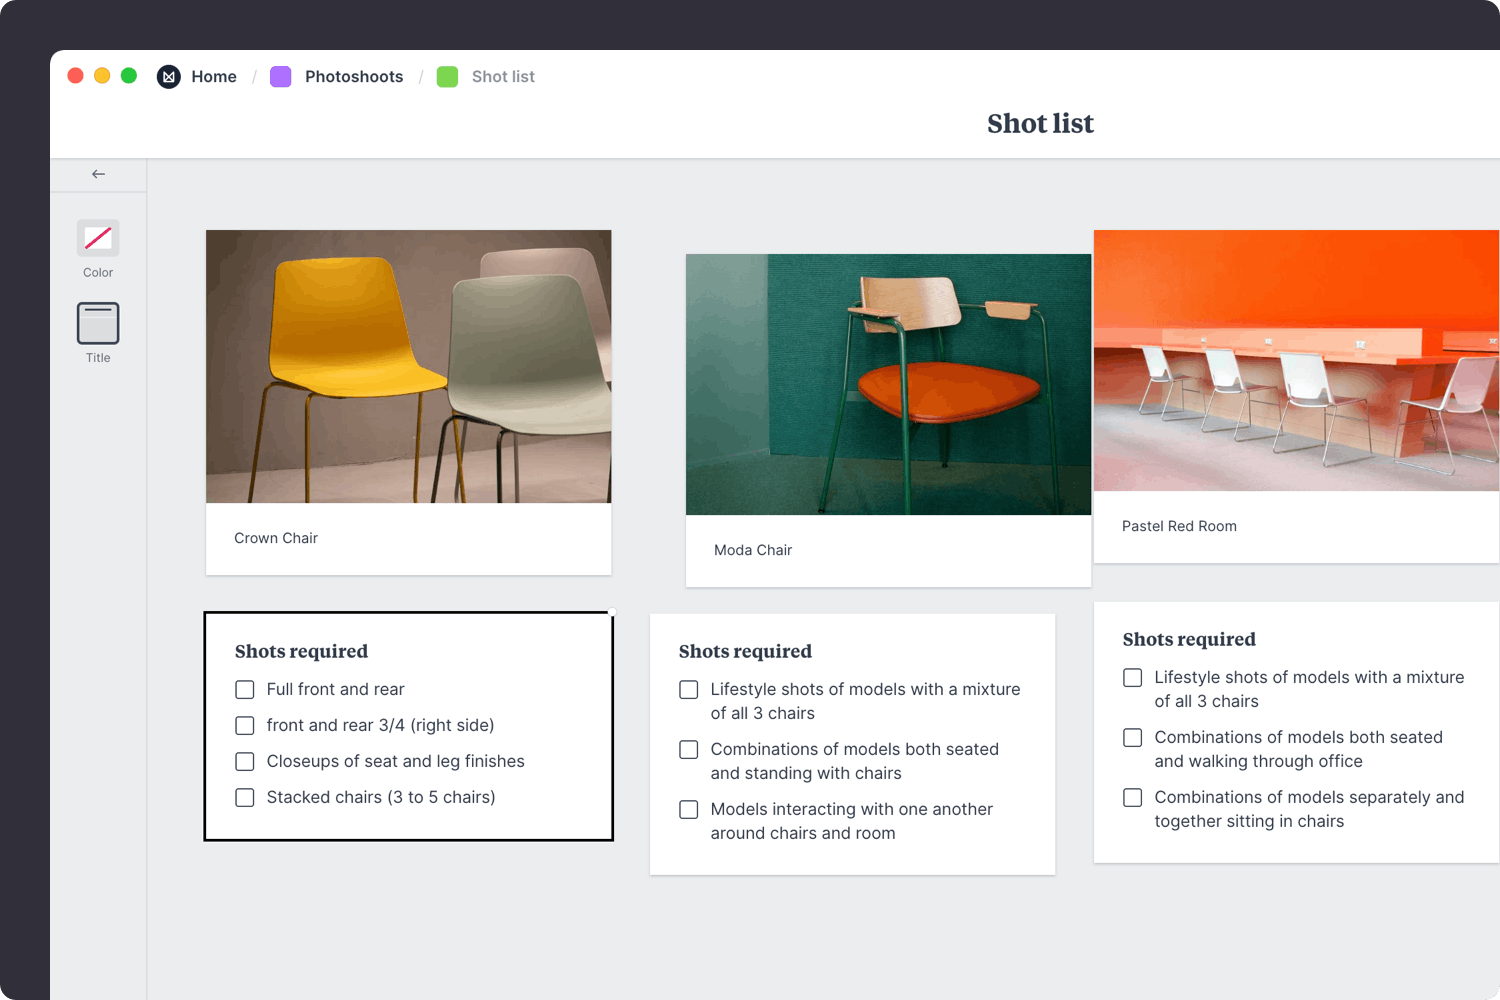
Traditionally you'd print out your shot list to refer to on the day. But these days digital shot lists can be accessed on phones or laptops. This way you can check off each shot or adjust it as you need.

Download the Milanote mobile app
Now that your shot list is complete, you have a clear plan for the images you need to capture during the shoot.
Next, we'll create a call sheet to schedule the team…
You may have witnessed a disorganized photoshoot before—the models were late, the crew forgot the lighting or the studio wasn't setup properly. One vital document was missing—the call sheet.
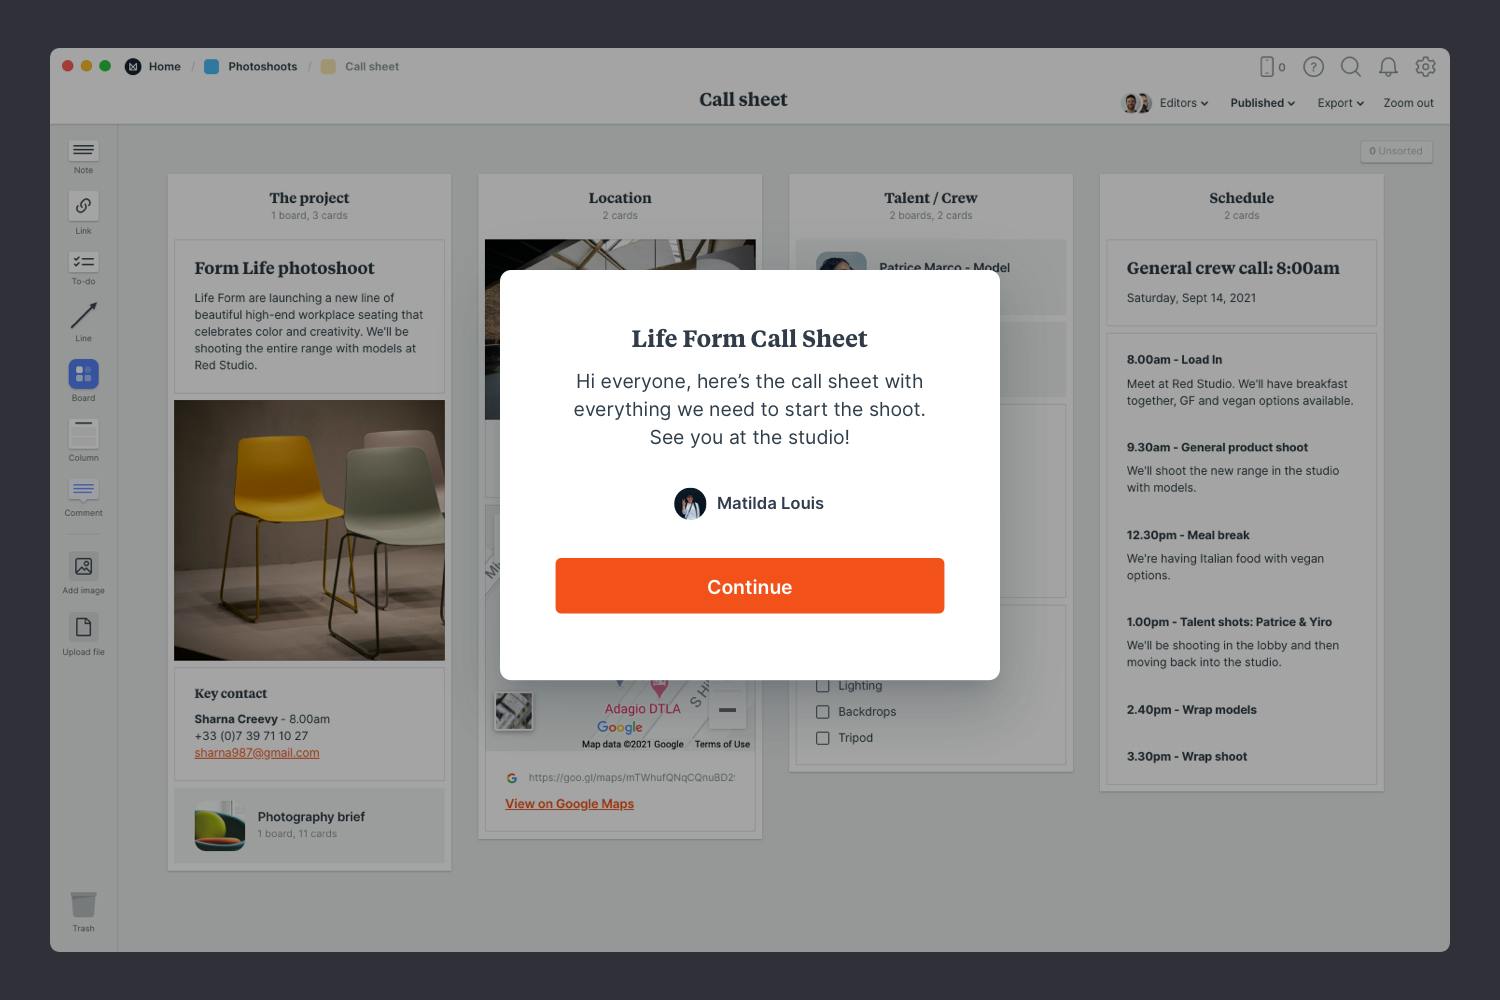
The call sheet is a simple, but incredibly useful tool for organizing your shoot. It outlines everything your talent and crew need to know before the day of the shoot. Crucial elements like the location, contact details, the schedule and most importantly the arrival time.
You’ll find the board to make your call sheet on the Photoshoot plan board. Double click on the Call sheet to open it and start laying out a plan for the day of the shoot.
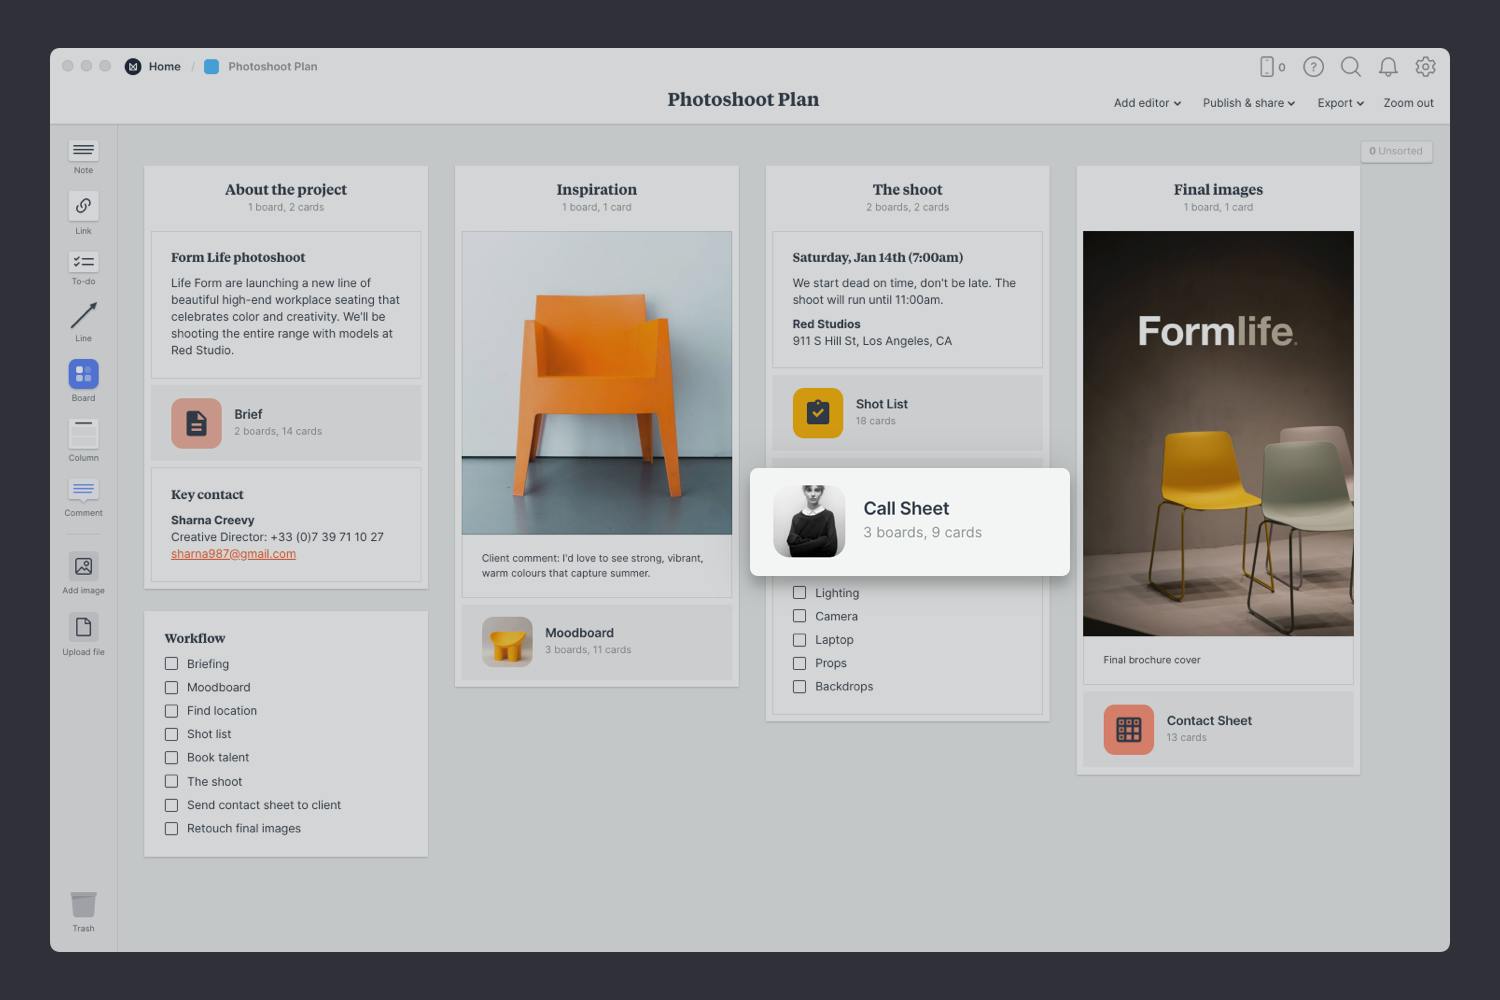
Double click the Call Sheet board to open it.
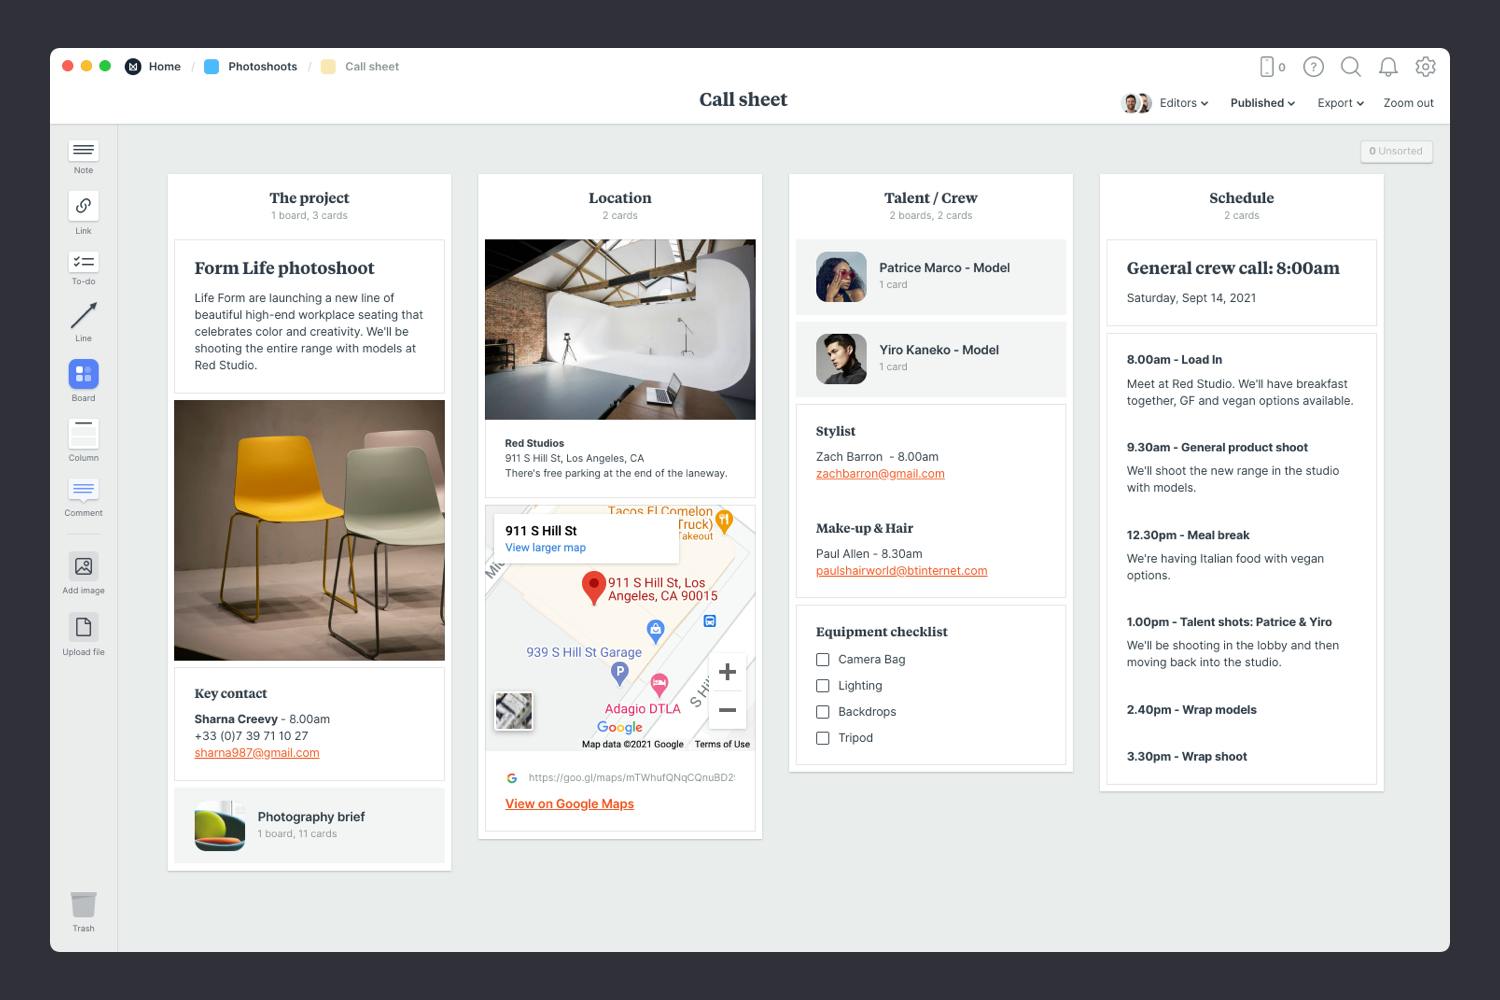
Add some background information about the shoot for your models and crew. Next, add the location of the shoot and any details that will help people arrive safely and on time. Explain where the parking options are, nearby public transport and any details about to get into the building.
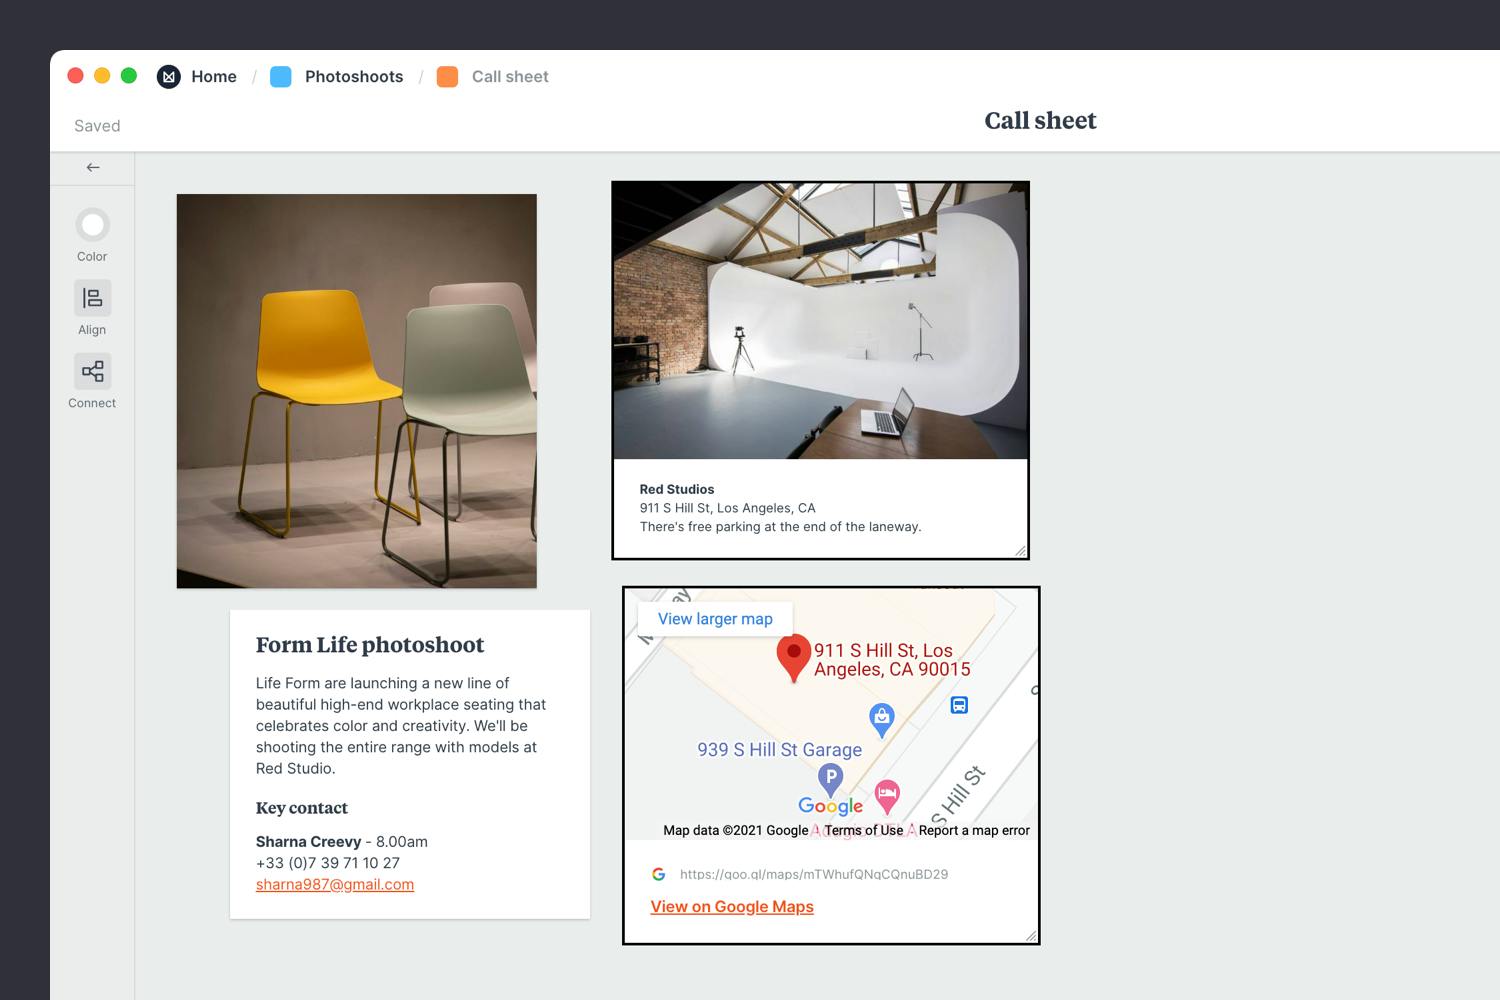
Add a note to describe the project.
Start typing then use the formatting tools in the left hand toolbar.
Embed a Google map to show the location.
Copy the share link from Google Maps, paste it into the link card in Milanote and press Enter.
Who's involved in your shoot? List your talent and crew along with their contact details. This will save you hunting around for phone numbers when plans inevitably change on the day. Next, add any specific arrival times so each person knows exactly when they're expected.
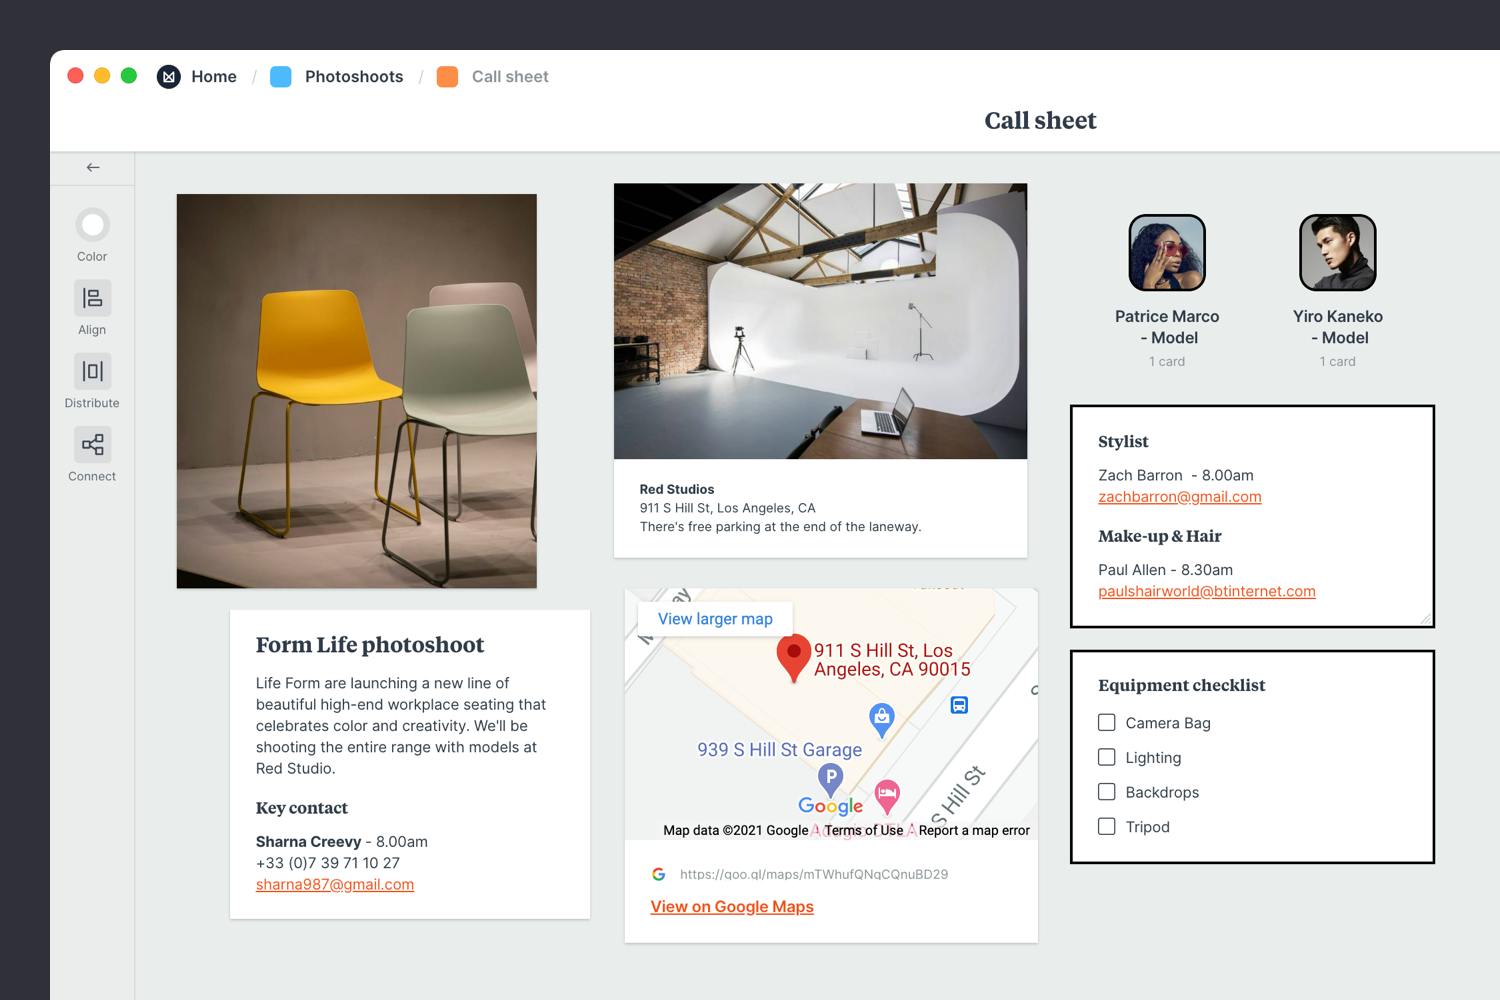
Add a note for the details of your crew.
Start typing then use the formatting tools in the left hand toolbar.
Create a checklist for your equipment.
Start typing then press "Enter" to create a new item. Add a title to your to-do list using the left hand toolbar.
Probably the most important part is the schedule—specifically the general crew call time. The general crew call time is when everyone needs to arrive on location. Under this, add the key events for the day so everyone can clearly see what's on and when. Don't forget lunch!
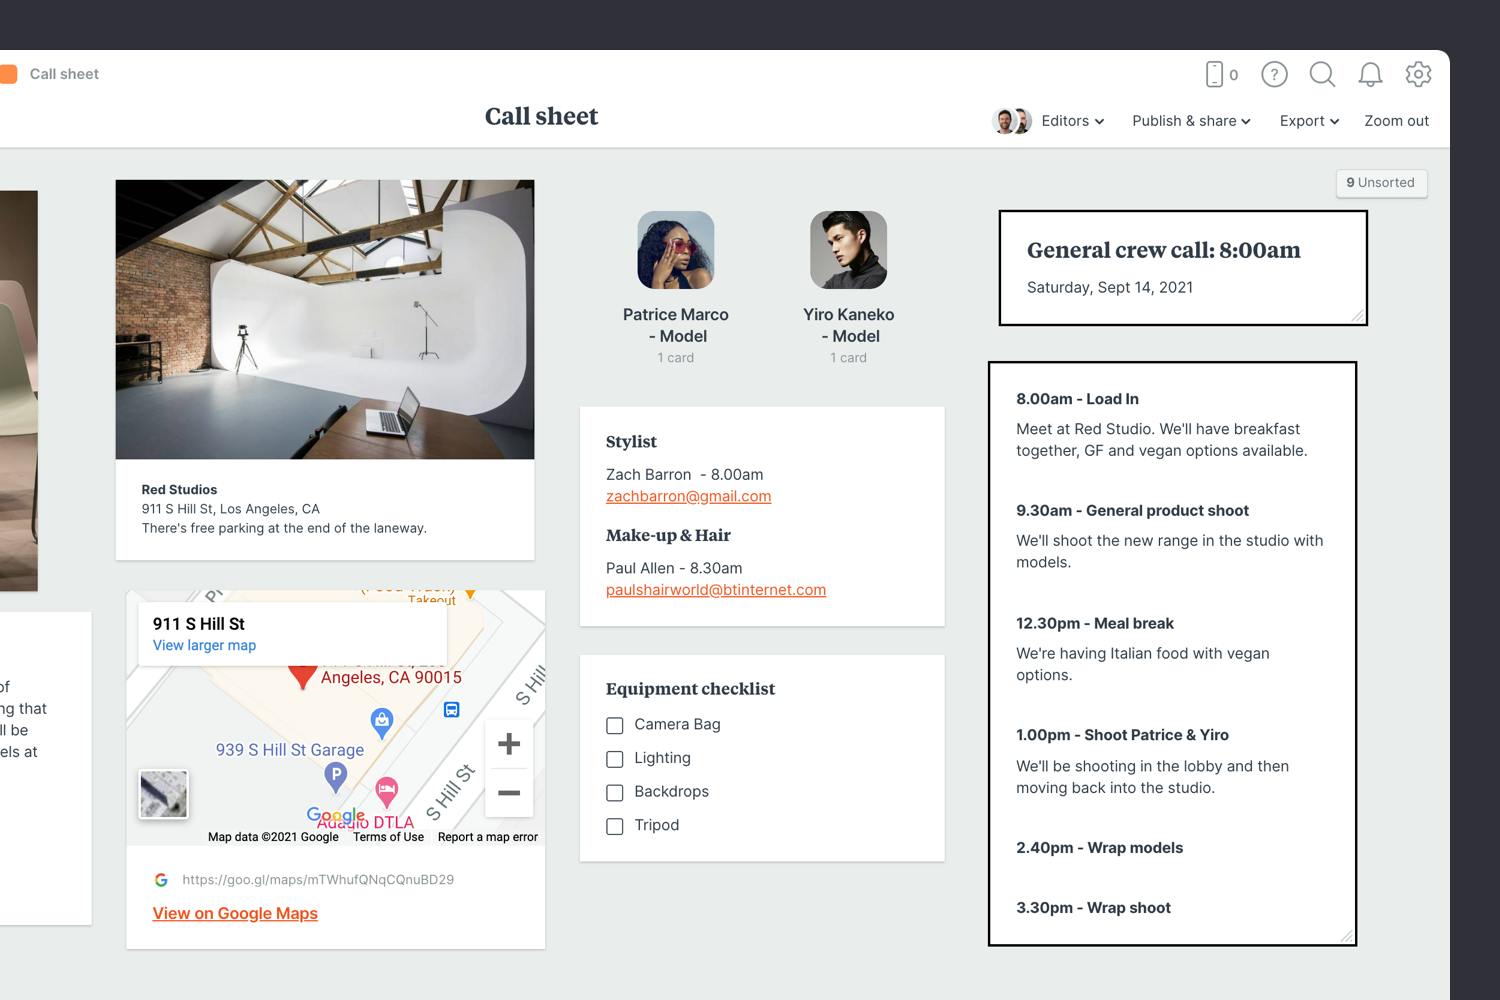
Add a note to describe each activity on the schedule.
Start typing then use the formatting tools in the left hand toolbar.
Once you have everything you need, it's time to organize your call sheet so it's easy to scan. Then share it with your team so everyone can start preparing for the shoot.
Create a column for each part of your call sheet.
Name it, then drag any relevant notes or images into your column.
Publish and share the call sheet with your team.
Write a welcome message under the "Publish & share" menu. This will display the first time someone views your board.
You've just finished your photoshoot and you know you've captured some amazing shots. It's time to organize the best ones and share them with your client. The easiest way to do this is with a contact sheet (sometimes called a proof sheet).
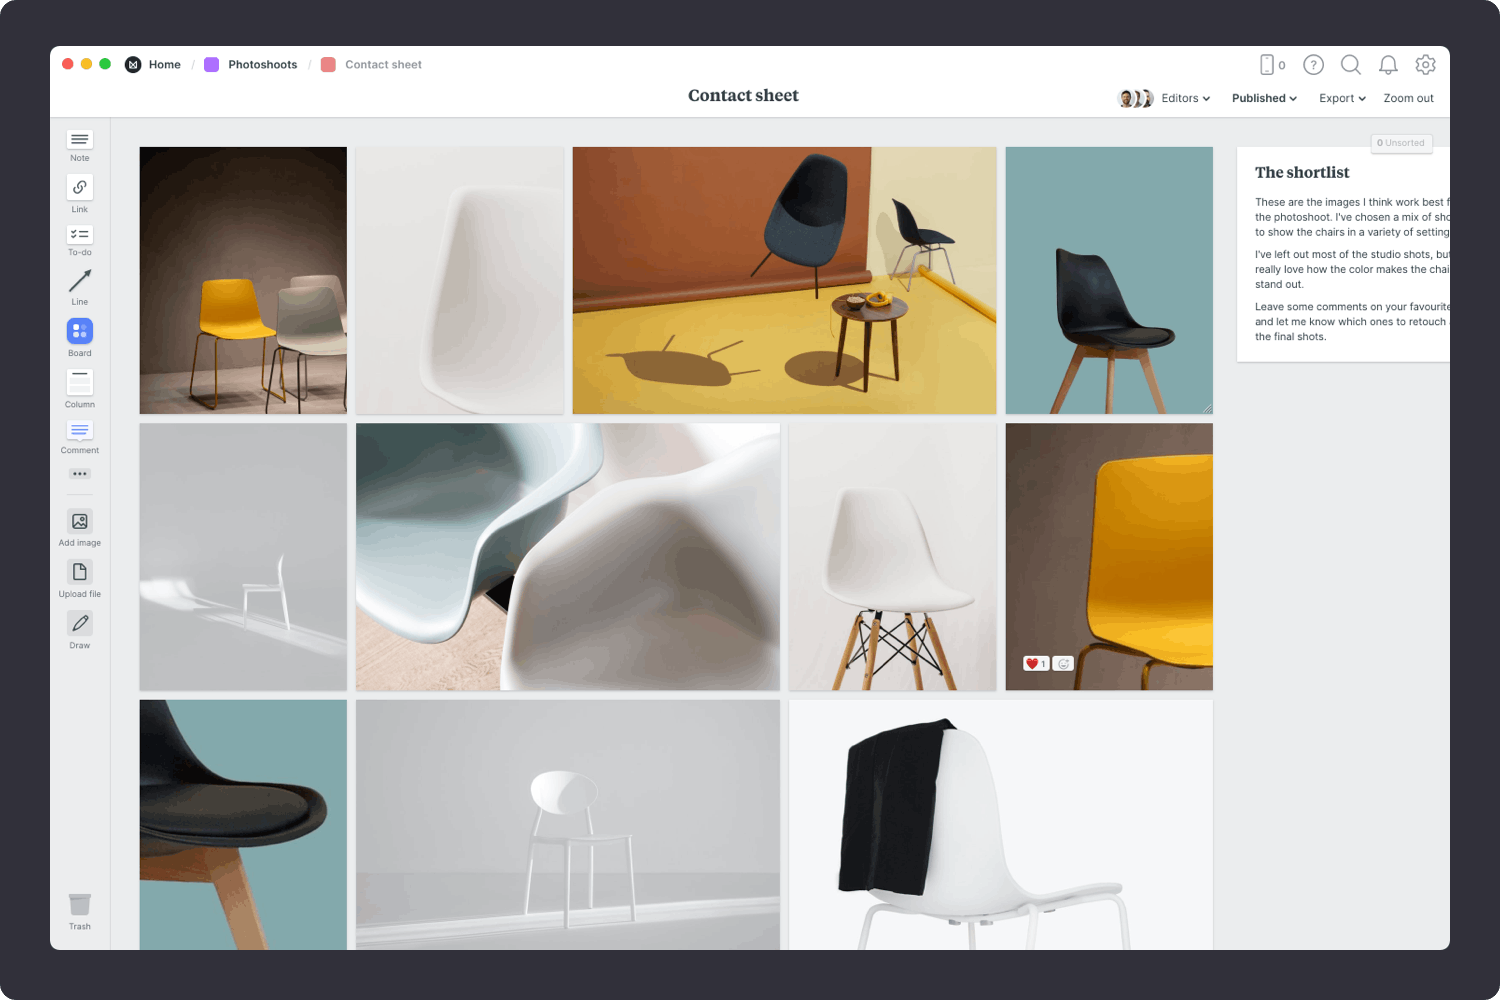
A contact sheet is an online gallery of the best images from your shoot. It's a simple way for you and your client to review the shortlist and select the final images for the project.
It's a huge time saver for everyone involved. The client doesn't have to sift through every photo taken on the day and the photographer only needs to retouch the ones their client likes.
You’ll find the board to make your contact sheet on the Photoshoot plan board. Double click on the Contact sheet to open it and add your shortlist of images.

Double click the Contact Sheet board to open it.
You might have captured 200 images from your photoshoot but your client only needs 5 final images. It's time to reduce your list to a group of unedited images you want them to choose from. Discard the shots that are bad from a technical perspective and those that are generally unflattering. Try to be ruthless at this stage so it doesn't become a time consuming exercise.

Drag your photos onto the board to create a grid.
When you drag a group of images onto an empty board, Milanote will auto-arrange them into a beautiful grid.
Providing some background on why you selected this shortlist of images will help your client understand your thinking. What is it that you love about these images? Share your thoughts on the lighting, composition or something special you see in them. Refer back to the brief or moodboard you created to tie the images into the initial concept.
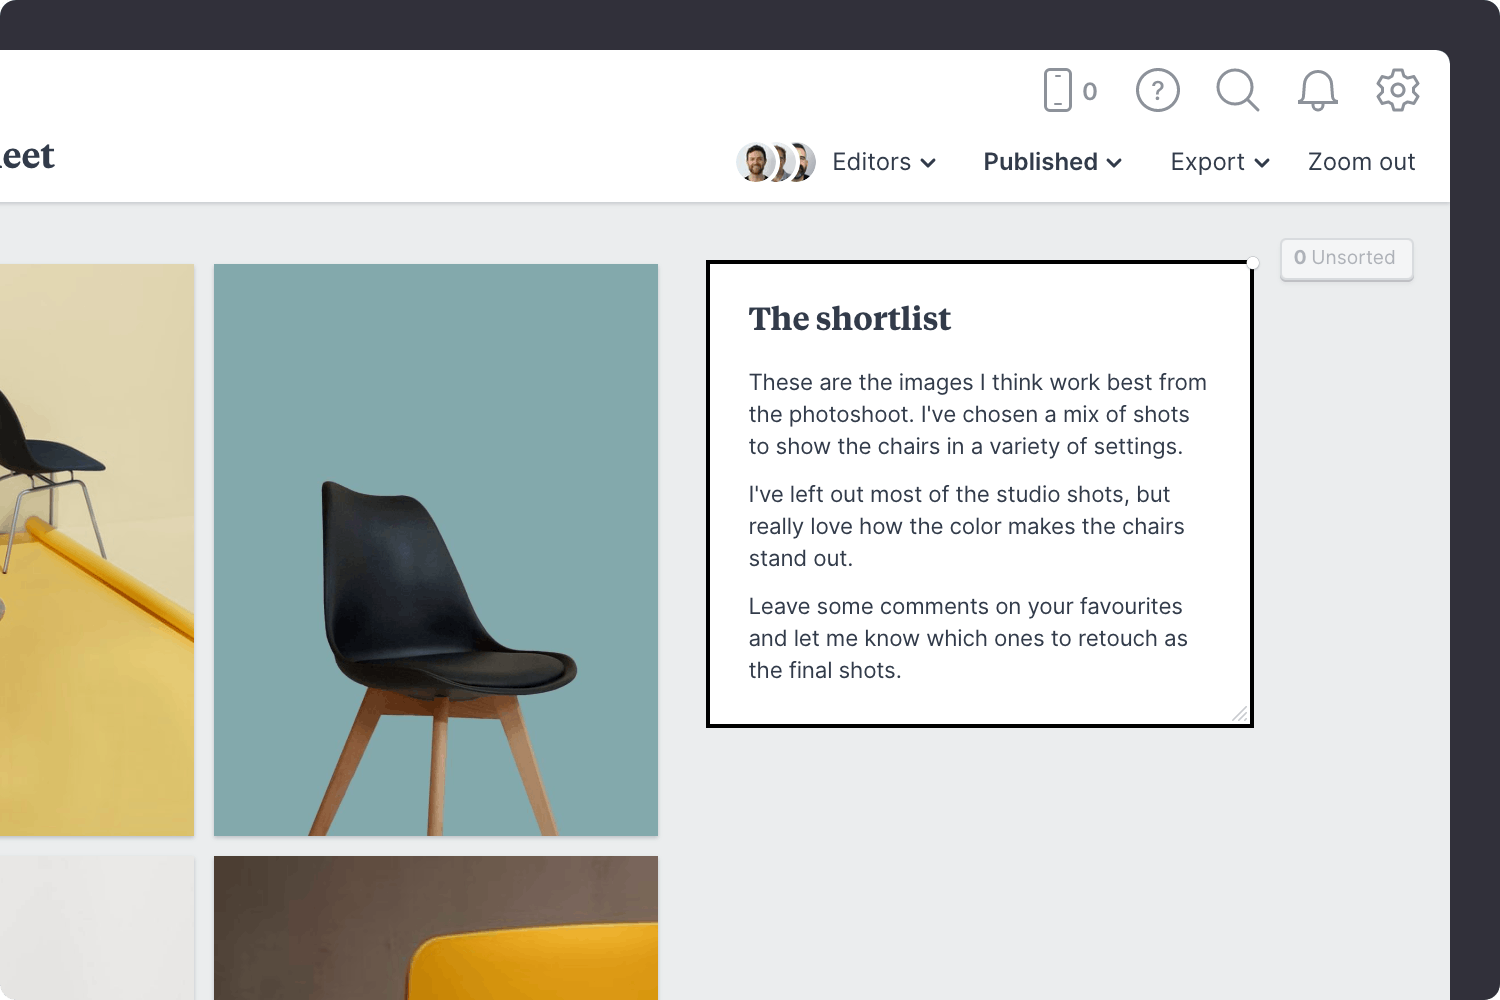
Add a note to explain your thinking.
Start typing then use the formatting tools in the left hand toolbar.
Once you've prepared your contact sheet, it's time to share it with your client. This is an exciting moment for them as it's usually the first time they've seen the output from your photoshoot. They can leave comments against the photos and vote for their favourites. It's much quicker and more collaborative than creating PDFs and emailing comments back and forth.

Share the board with your client or team.
Open the "Publish and share" menu from the title bar of your board. Press "Publish via secret link", then copy and send the link to your client.
Hopefully this guide has helped you become more organized and given you the space to let your creativity shine. If you're just starting a new shoot, use the Photoshoot Plan template below to get setup in minutes.